Jessica Fox, founder of Florida Virtual Bookkeeper is a Pixie pioneer.
Custom fields and custom field groups are pretty standard tools within the Pixie client dashboard, but for Jessica they're much more.
Watch the video below, or scroll down to read about how Jessica has revolutionised how she gets her monthly bookkeeping work done.
Hello, I’m Jessica Fox, the founder of Florida Virtual Bookkeeper and I love efficiency and automation, so I’m very excited to share with you one of the things that I absolutely love about Pixie and it revolutionised how I get my monthly bookkeeping work done.
That is - the power of custom fields.
You can create as many custom fields as you want in Pixie to suit the specific needs of your clients and the services that you offer.
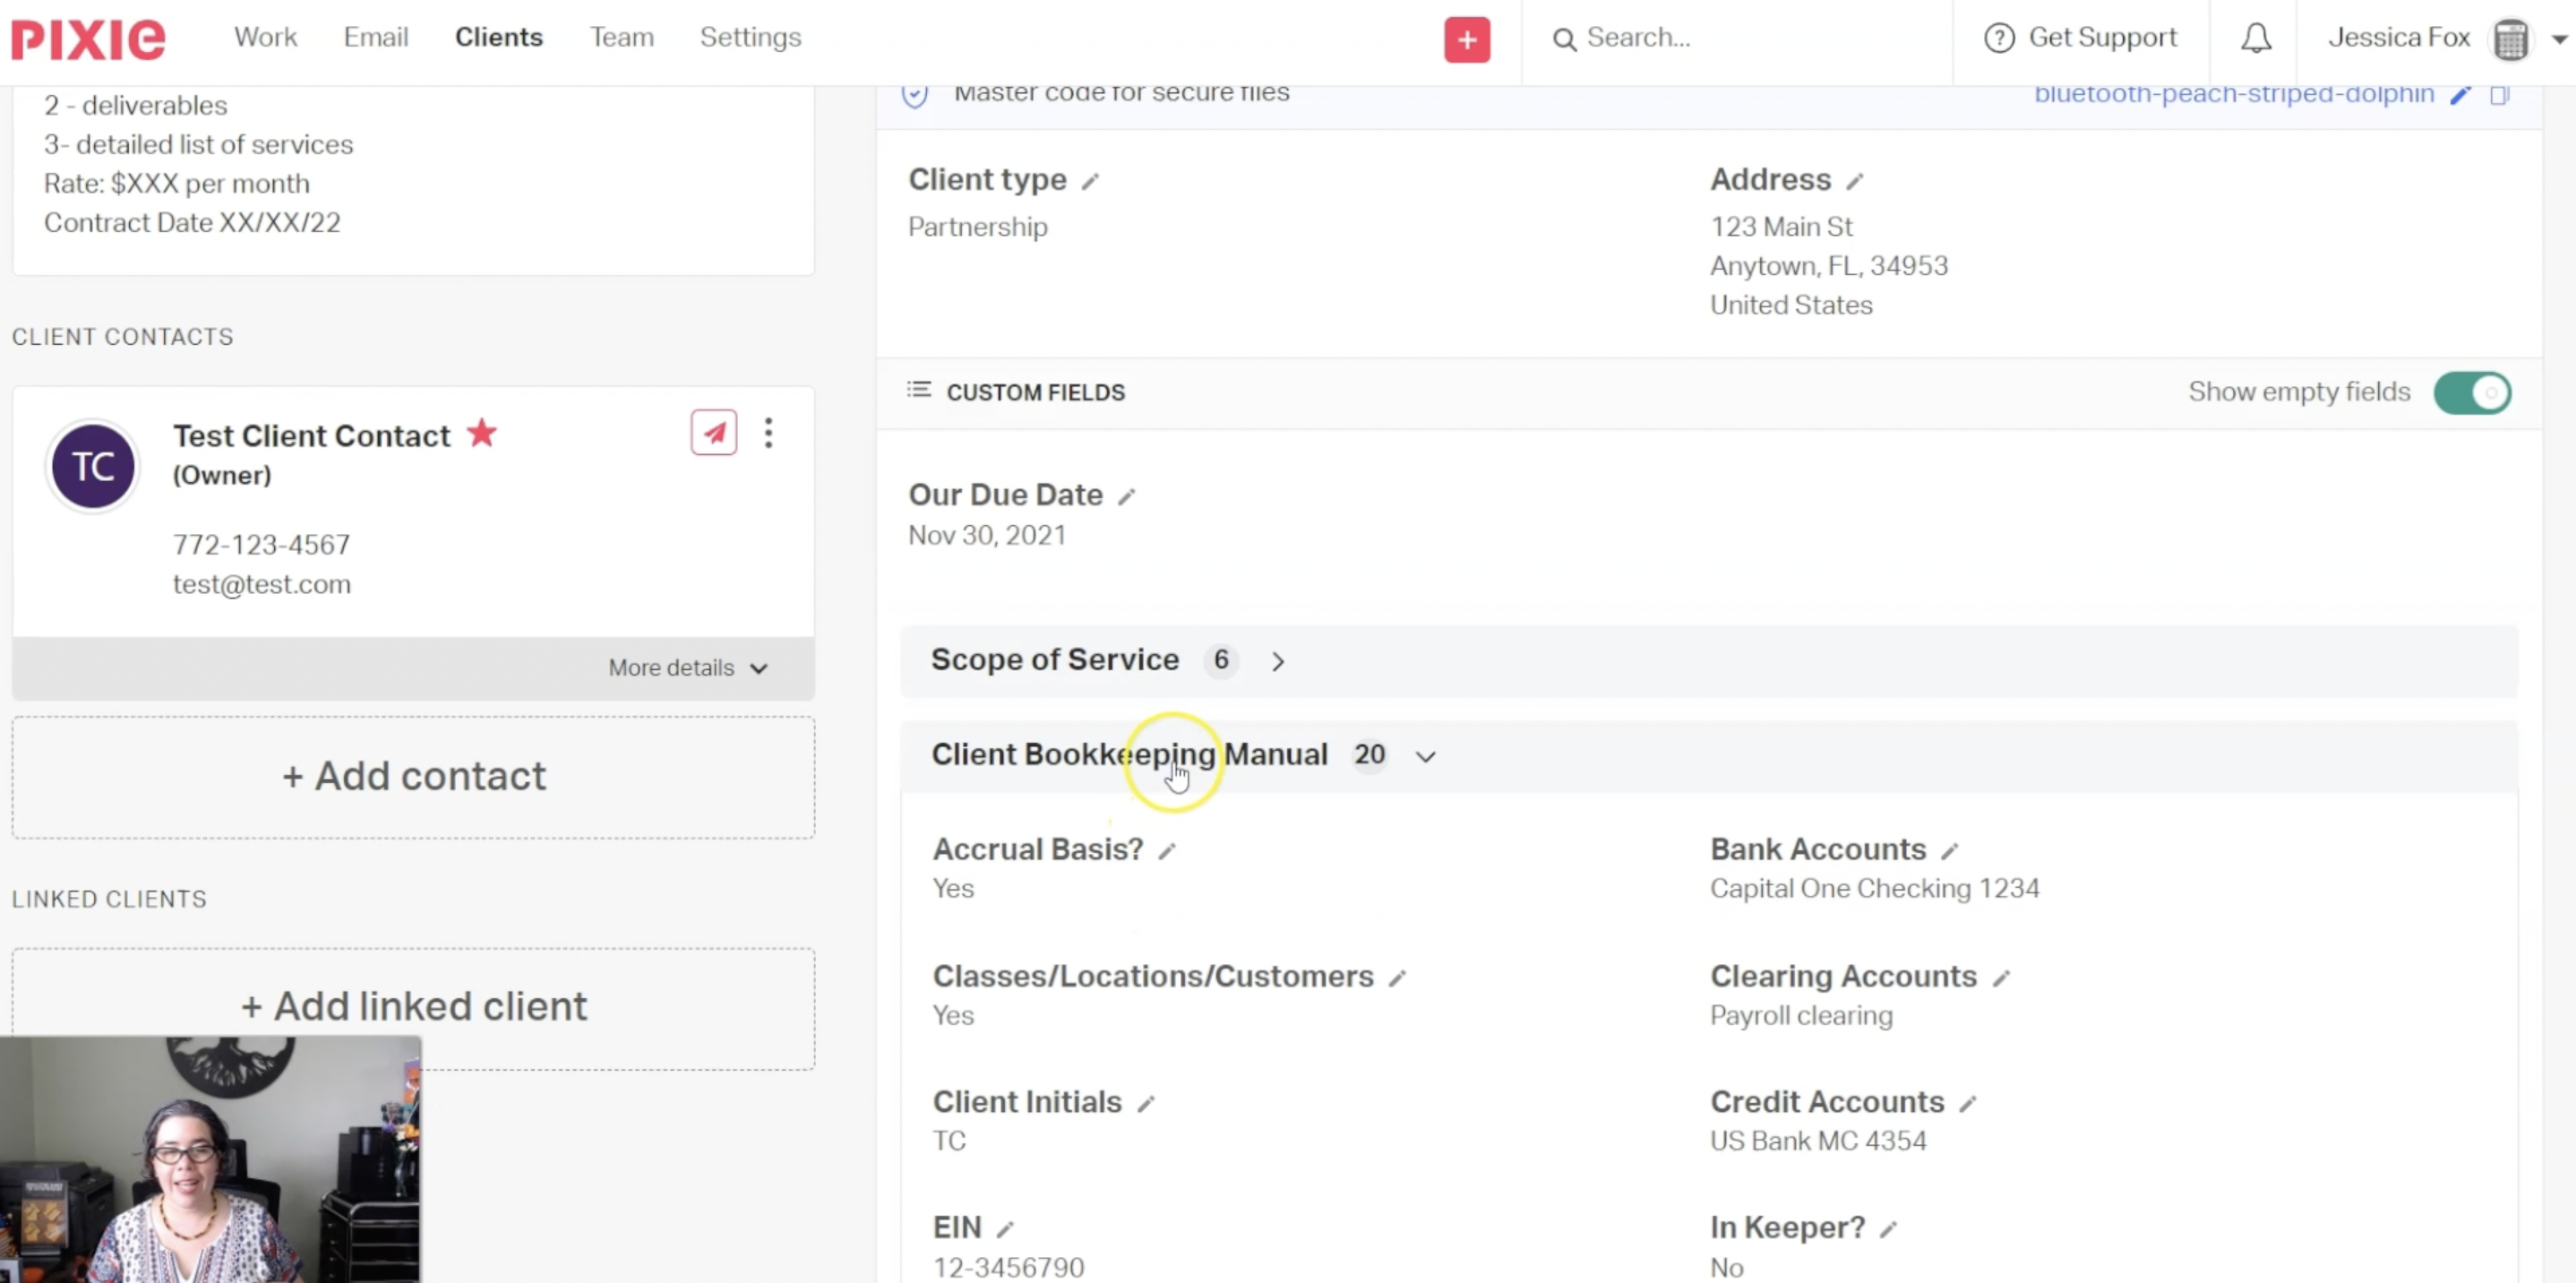
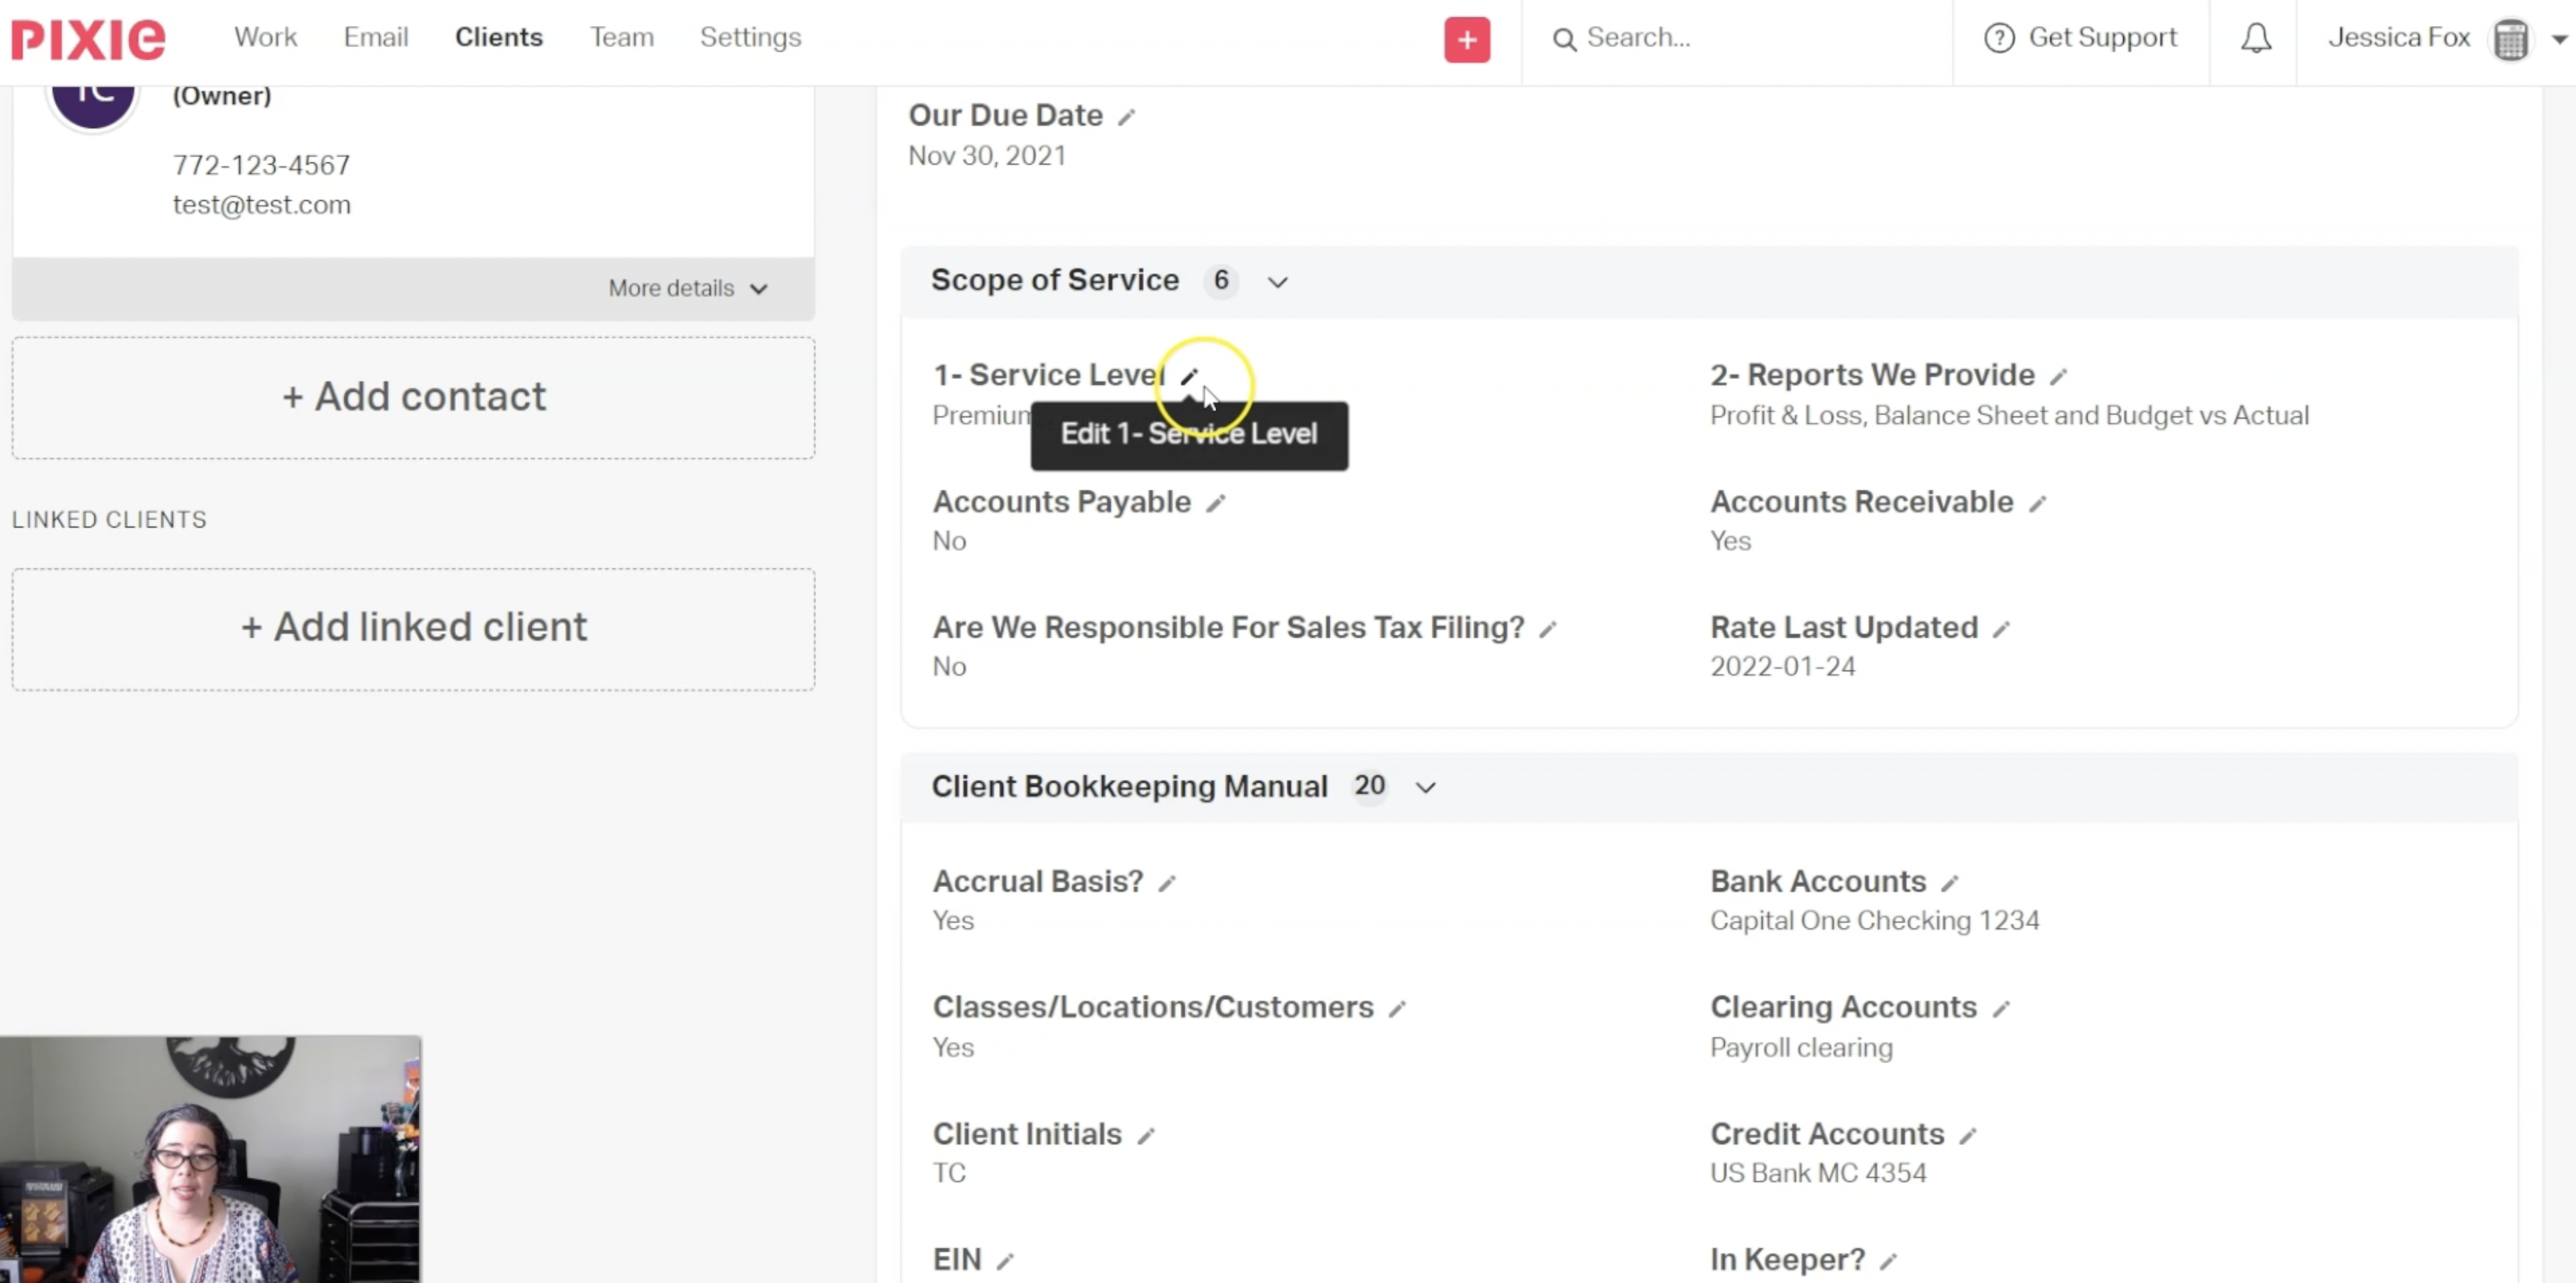
Recently, I was blown away by the fact that I can now group those custom fields so that I can have things organised in groups.
They are expanded or collapsed as needed and it keeps my client details page pretty organised so that it’s not overwhelming to look at.
But it doesn’t stop here.
I am not only using these fields to know at a glance the details for my client, but I am also using them to automate and have customised tasks for each of my clients while using just one task template.
Before that, whenever I had a different type of client or a different scope of service, I needed to create a customised checklist for that client.
It worked, but it meant any time I wanted to make an improvement or tweak my list, I had to update multiple versions.
Not anymore.
With the power of the placeholders, I am able to have the information in these fields automatically update the task template for that specific client.
It looks like this.
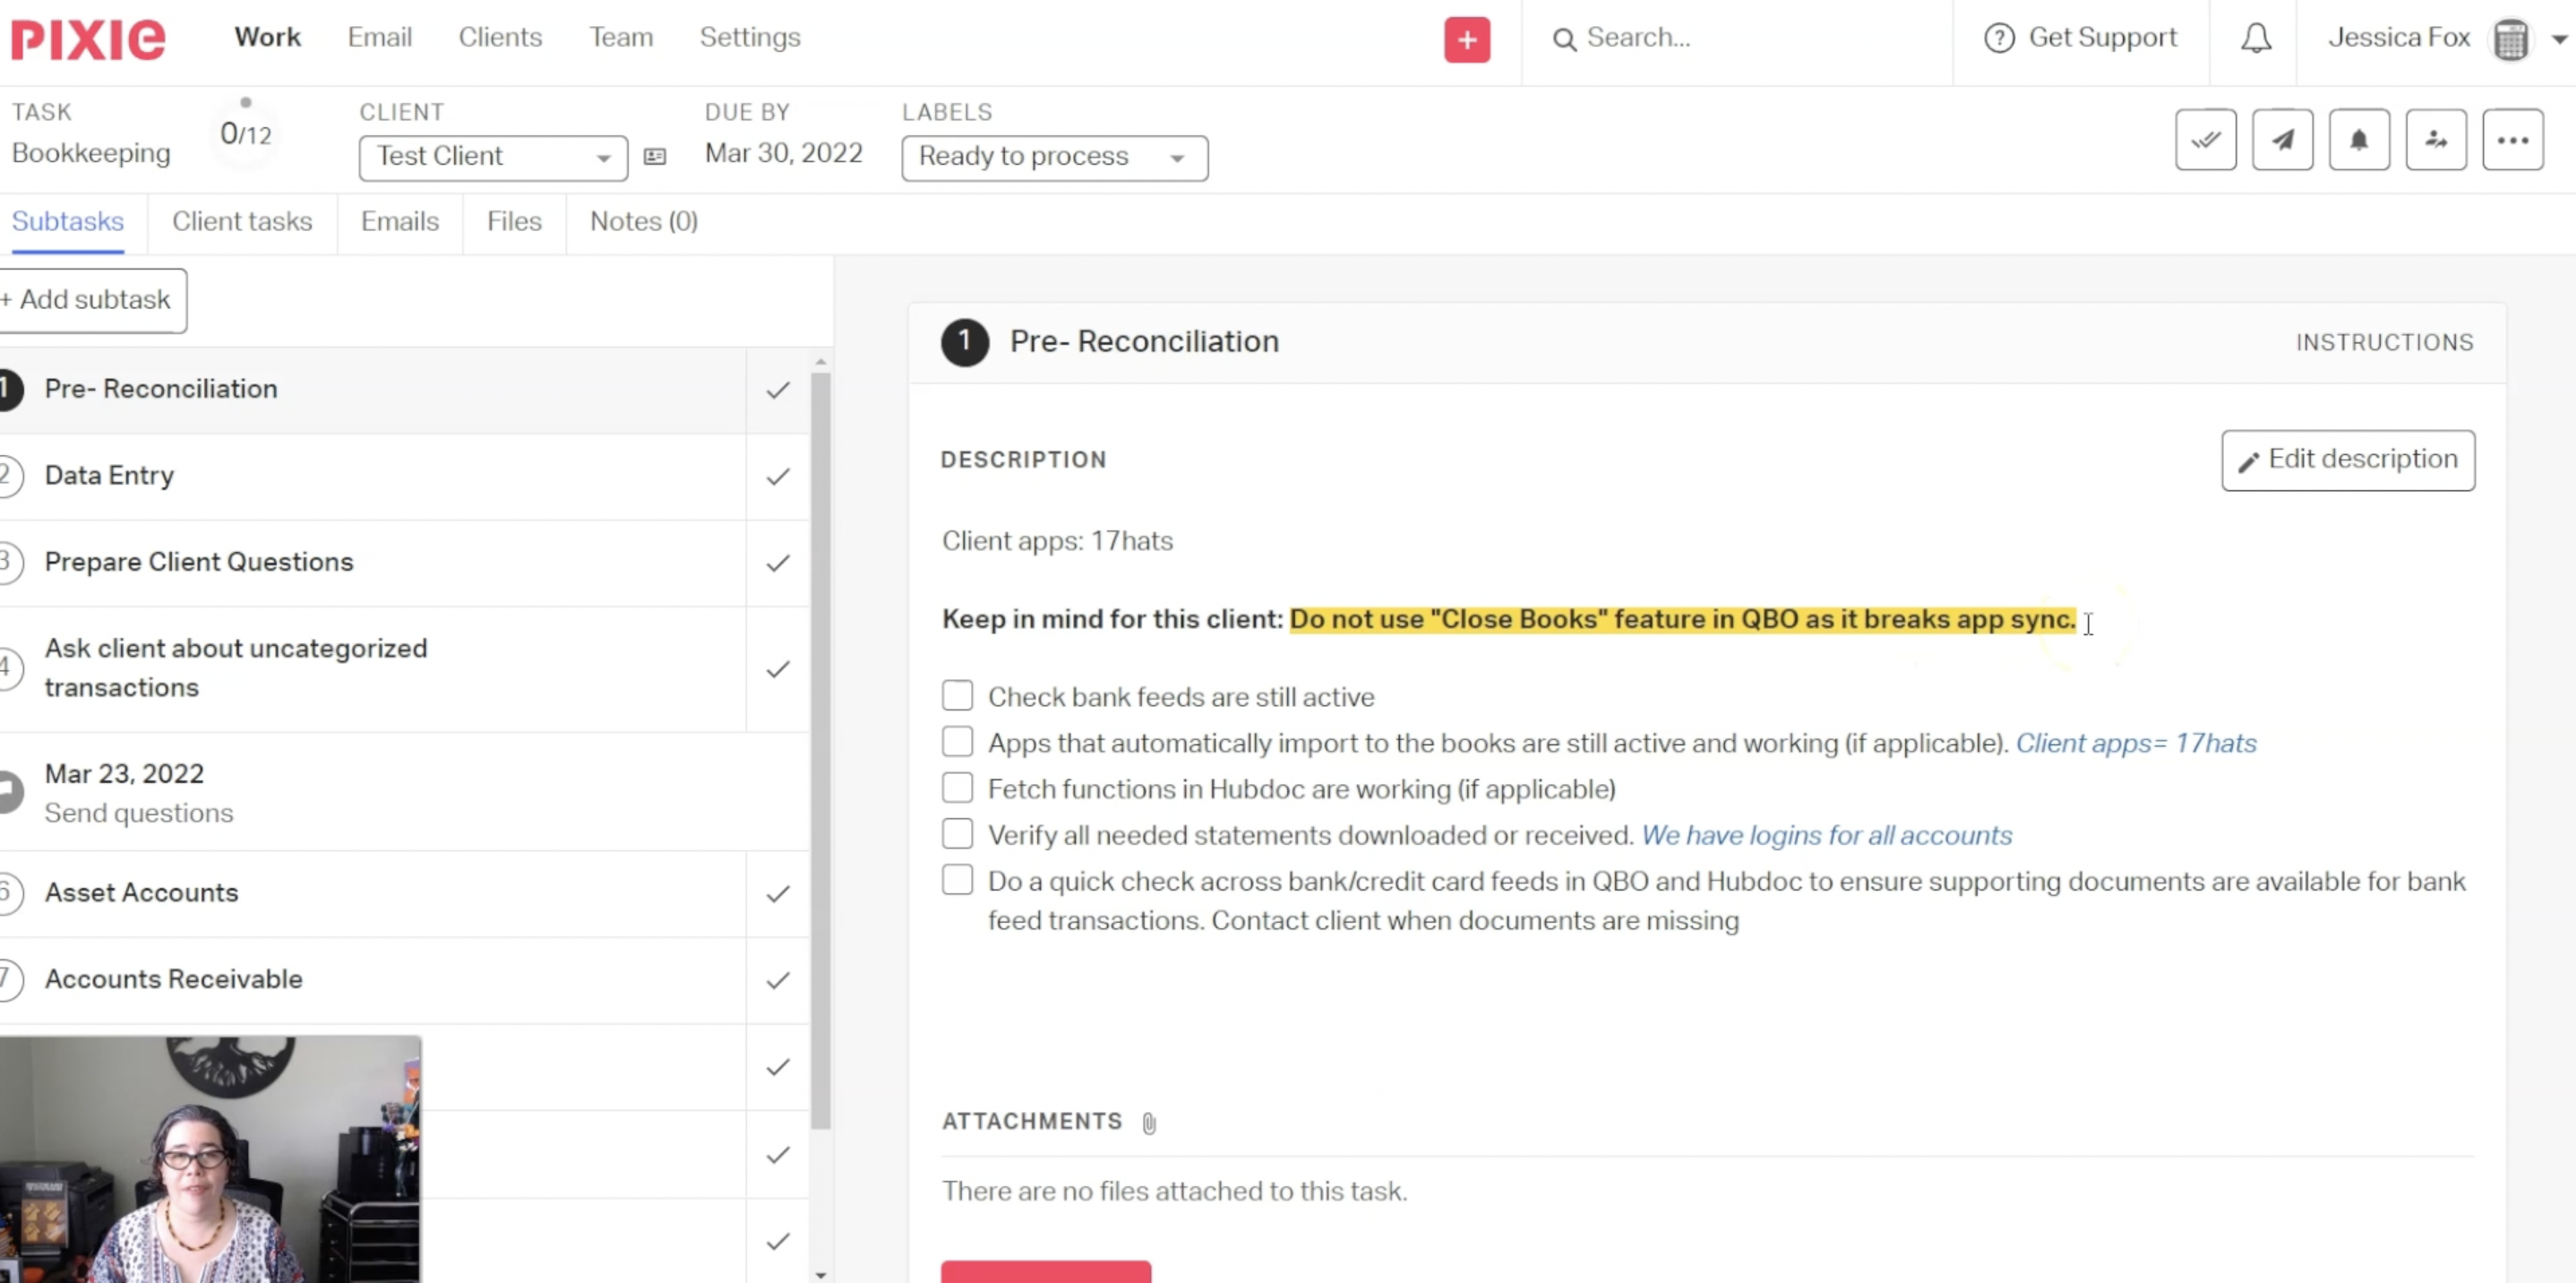
This is a standard monthly bookkeeping checklist, and as I am doing the work, it’s filling in the information that I need to see at a glance for each client.
Before that, I used to have a checklist in one screen, the client's details in another screen, and then I needed to have their books open.
This saves me some bouncing around.
I no longer skip details, forget notes. It makes it easier for my staff to know exactly what they need to know for the specific file that they’re working on.
For example, this information here.
This is automatically filled in based on the custom fields and I can bold it, I can highlight it so that it really jumps out, it will not be skipped. And as I’m going through the work I can see the details that are relevant for this specific client.
This will change if I’m doing the books for another client.
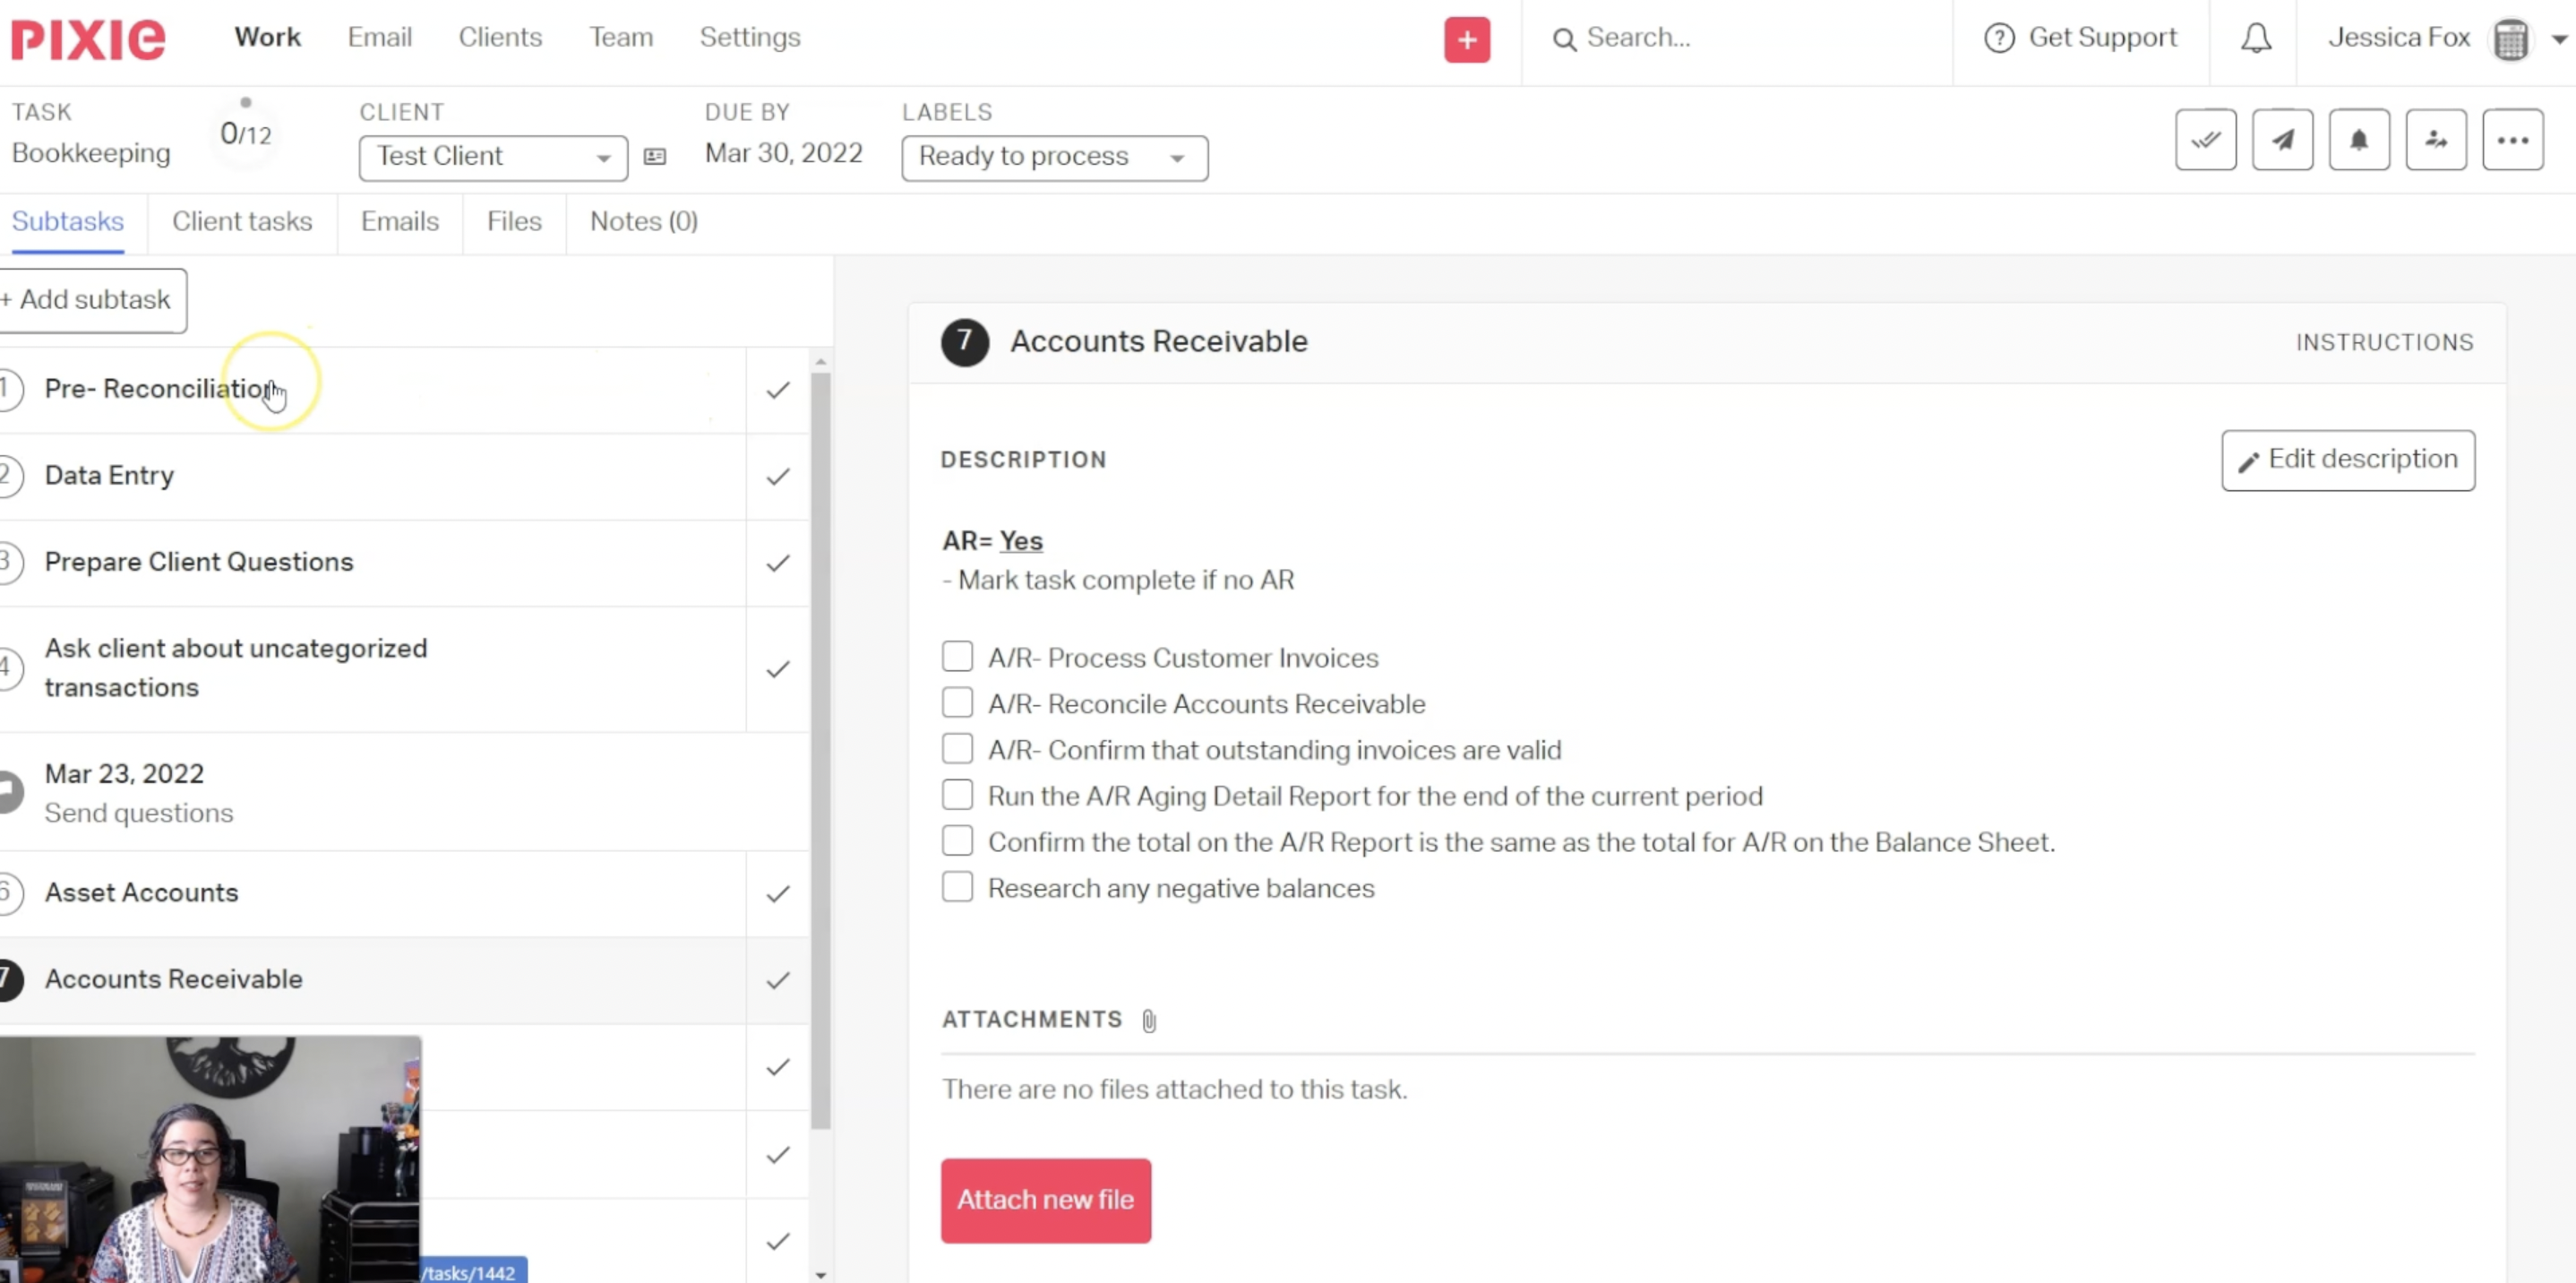
I also love the fact that there are custom field types that are yes or no.
This makes it so that if I have clients with different scopes of services, I can still use the same template.
For example, when I go to accounts receivable, based on the scope of service for that client, if AR is ‘yes’, I know that I need to complete these steps. If AR is ‘no’ then I can just mark this done and move on with the rest of the project.
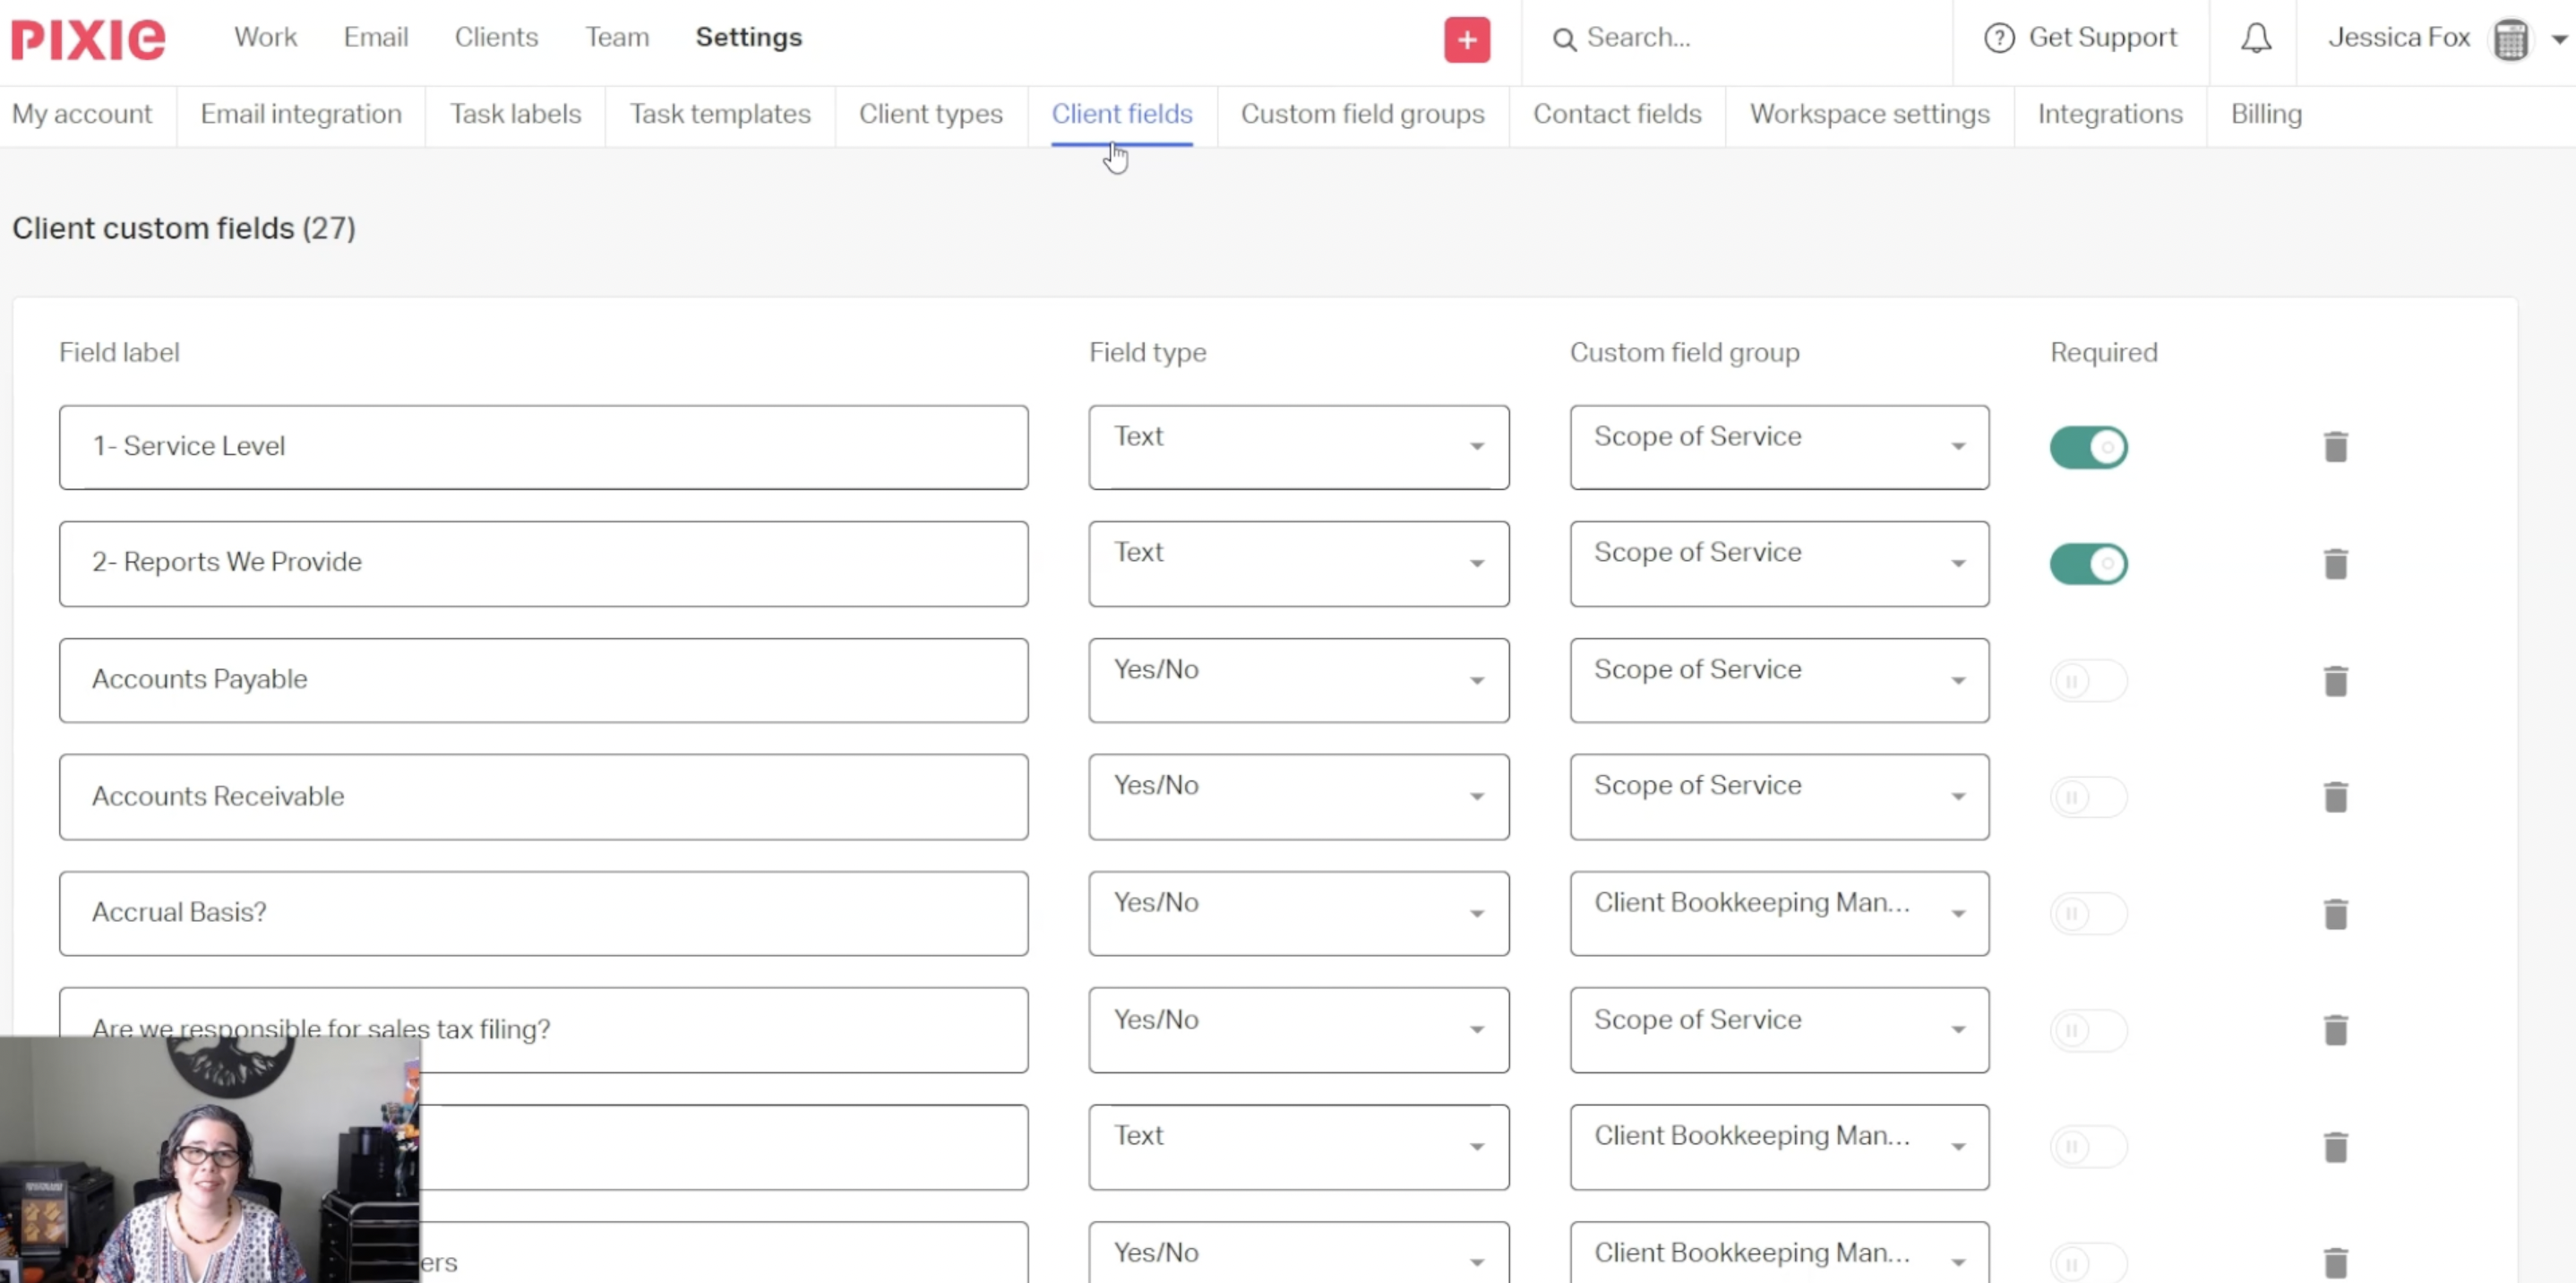
Now, you’re probably wanting to know “this is great, how do I do this?”. Well, you’ll need to go into Settings and set up your client fields.
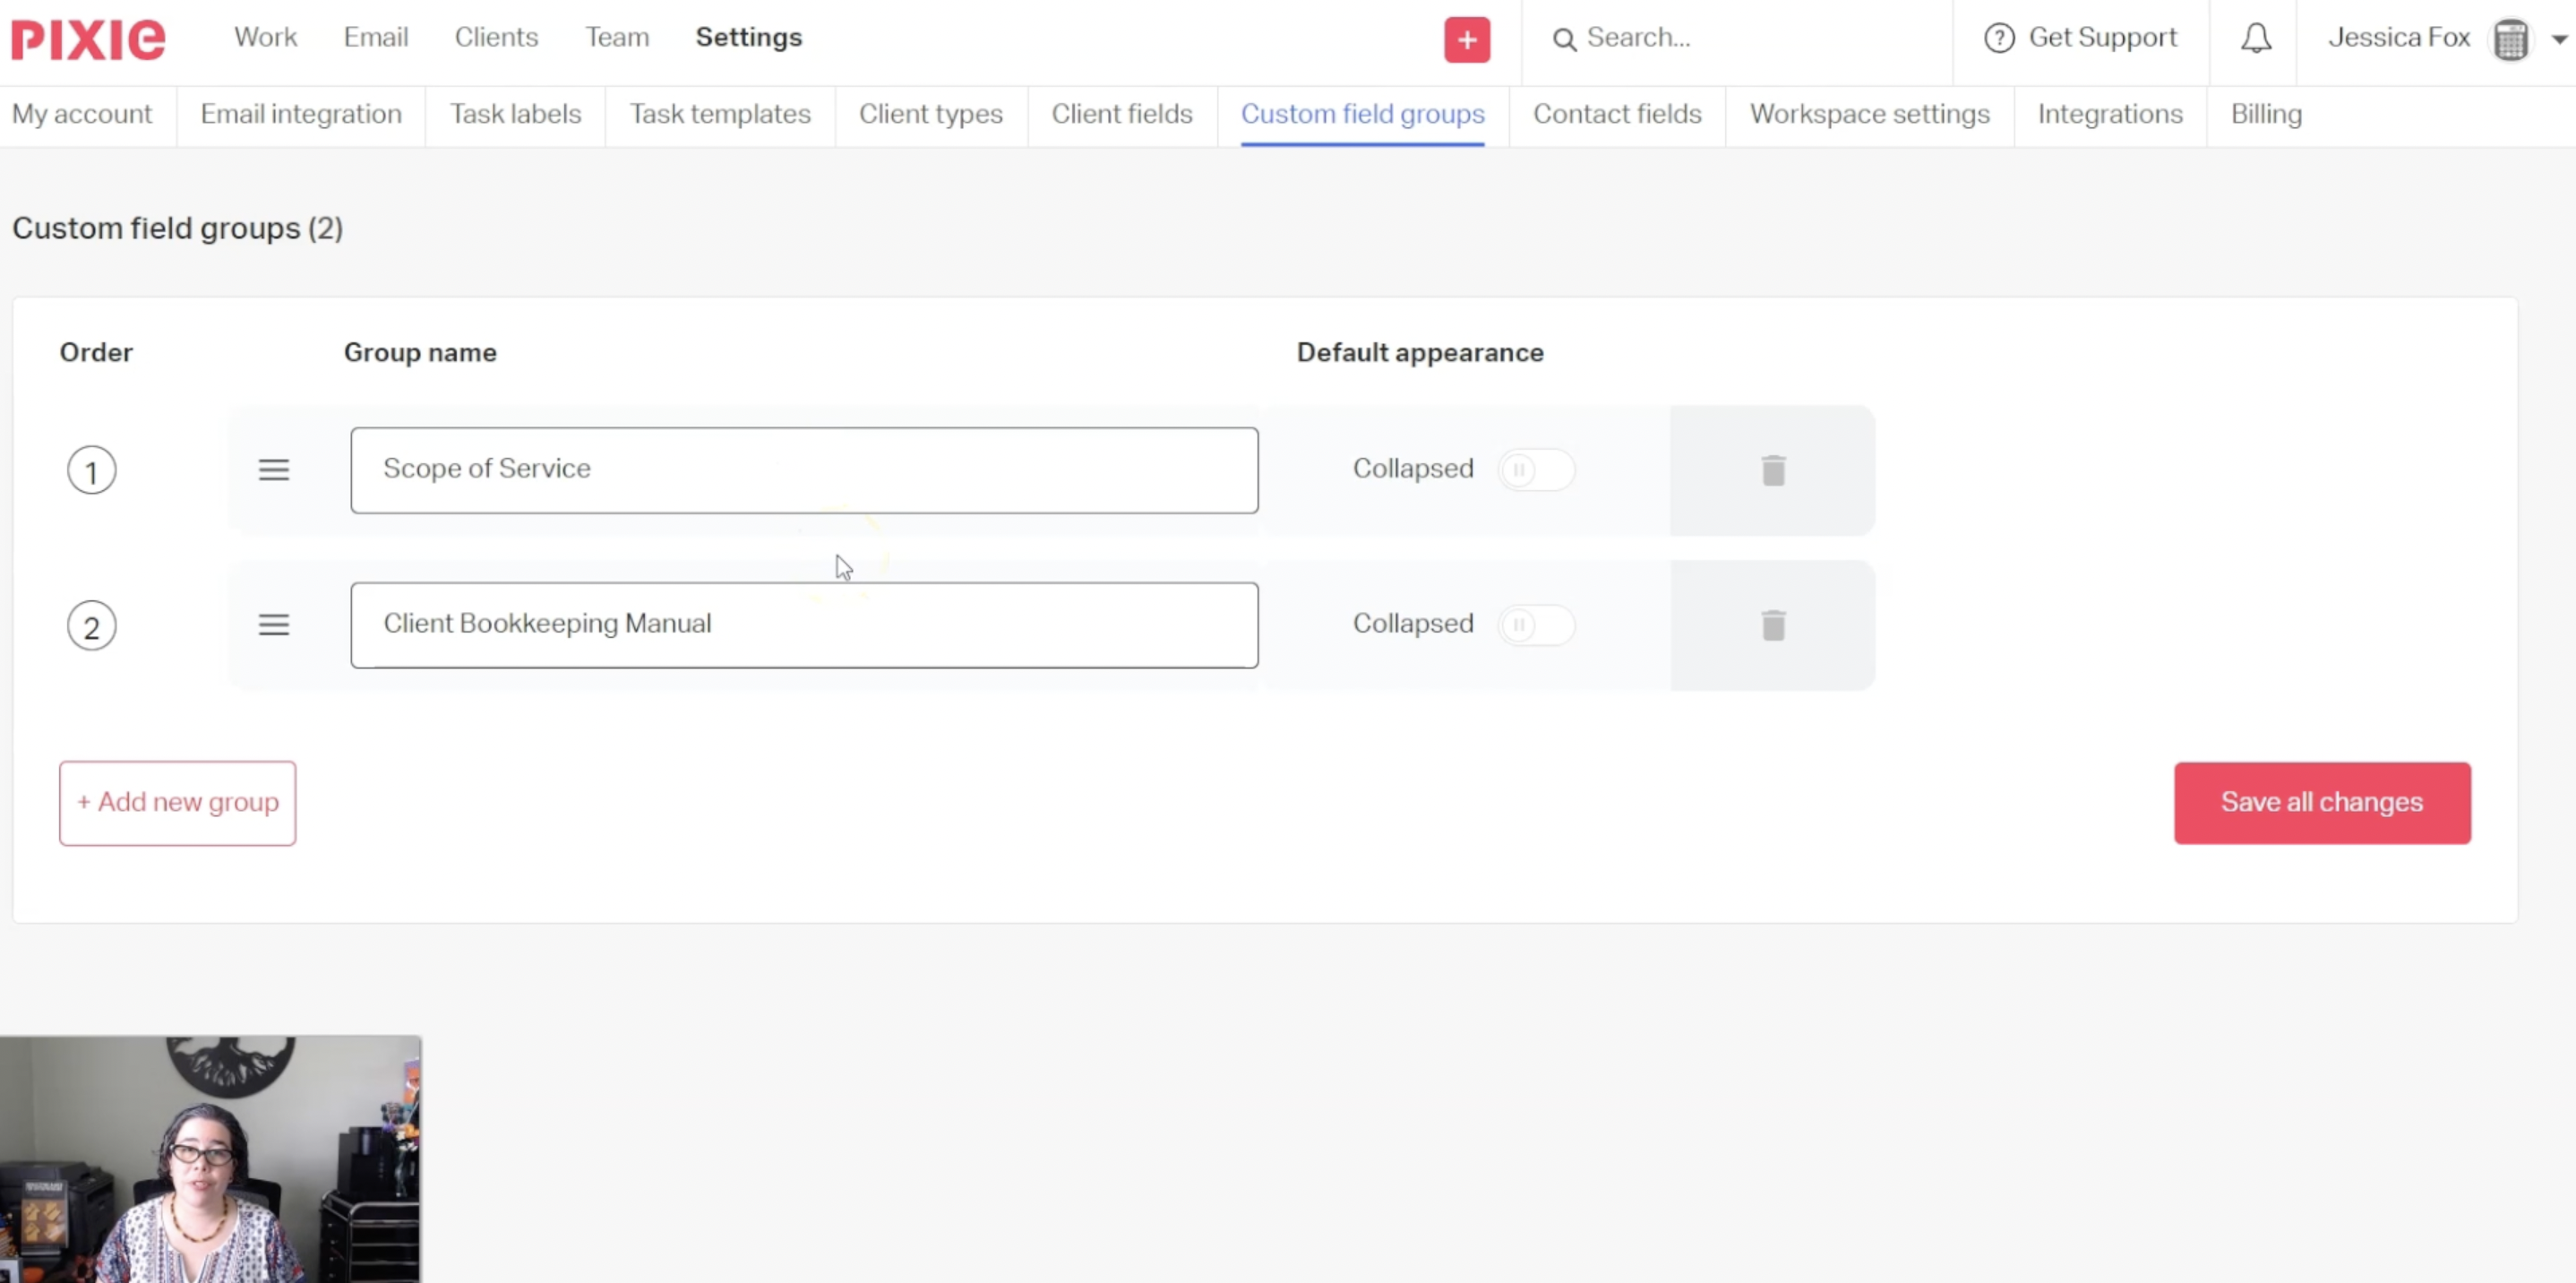
First, I encourage you to reflect on what type of groups you will like your custom fields in and set those up first.
Right next to it [client fields], you can click on Custom Field Groups, I have two to start, as I continue using the app I’ll likely create more. This is just a suggestion, you make what you think will work best for your business.
Once you have these groups configured, you can create all of the client fields that you want. Think of any information that you need to have at your fingertips when you’re doing the client work.
Do you need to know what their tax registration number is? You can create a field for that.
Do you need to know what banking institutions they use? You can create a custom field for that.
Do they have specific nuances on how the work is done? Definitely create a custom field for that.
As you create them, you can then assign them to the different groups, once you’re satisfied you can save them. Then you can go to your clients and fill in the information.
You can do this right here from the client details screen.
Or if you have lots of clients already set up, I encourage you to explore doing this in batch via the import feature.
Once these fields are configured for your client, I encourage you to look at your task templates and add the fields.
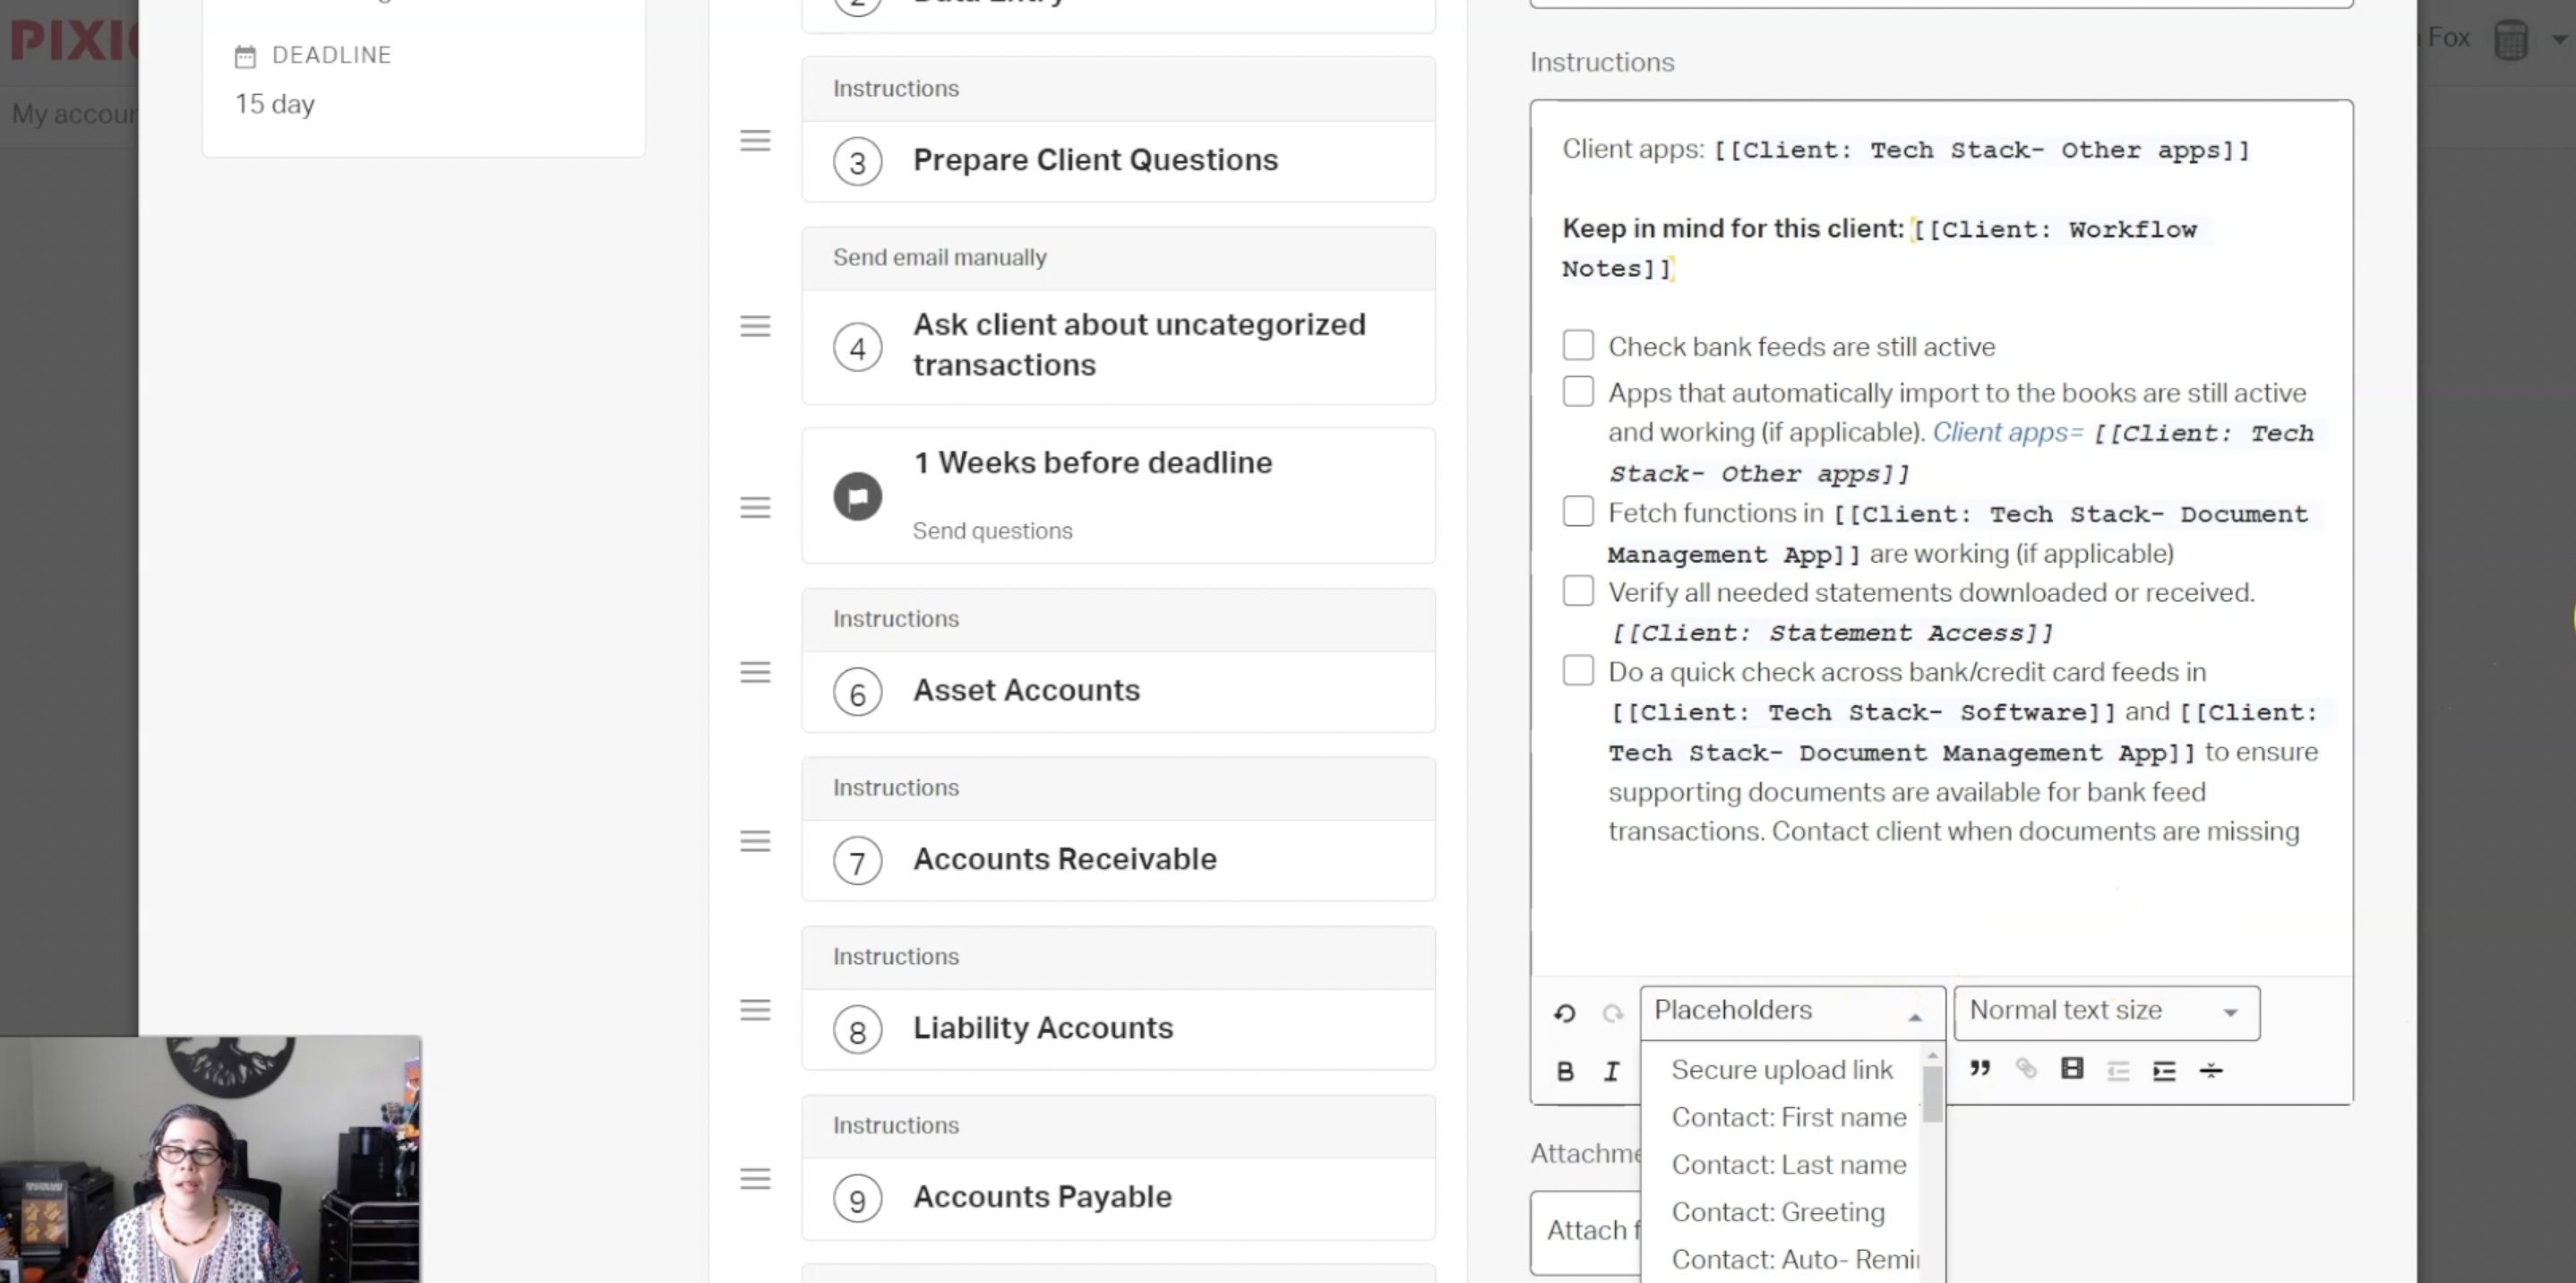
You can create a template from scratch or you can take one that you’re already using and edit it. In the ‘instructions’ section, you can add all of the fields that you have created. You will do that by placing the cursor wherever you need the field to be and then going to the placeholder section.
In here you will have a variety of options available and you will find all of the fields that you have created. When you select that, it creates the placeholder for it right here [where you originally placed your cursor], and you can then decide whether you want to make it stand out. You have the option to make it bold, highlight it, change the font colour, whatever works for you.
Add the fields everywhere that you like in your task template, everywhere that you will normally need to either remember something or look for it elsewhere, that is a good candidate for a custom field placeholder.
Once you’re satisfied, save the template, and when you add it to your clients it will automatically fill in their details.
I hope that you find this as exciting as I do and I look forward to knowing how you take the power of custom fields and make it work for your firm.
A Portuguese expat in London, Celso founded Pixie after learning first-hand about the challenges faced by small accountancy and bookkeeping practices. A product-focused leader with over 20 years experience in the software industry, at Pixie you'll frequently find him listening to customers and distilling their feedback into the product and go-to-market strategy.