3 ways to tame your inbox and turn emails into tasks
Ever since the 1970's, email has been slowly taking over our lives... Even today, with all of the innovative and unique means of communication at our dispo
Ever since the 1970's, email has been slowly taking over our lives...
Even today, with all of the innovative and unique means of communication at our disposal, email remains one of the most popular.
We check it first thing in the morning, we check it last thing at night, and with the amount of time we spend in email inboxes, you'd think we would be some kind of inbox heroes?
But we aren't. For many of us, finding our way to inbox zero is a seemingly impossible task.
Which is where turning emails into tasks can help...
Being able to quickly turn important emails into actionable items is a game-changer. It allows you and your team to stay on track without letting anything fall through the cracks.
By taking emails out of an inbox and into a task list, you can assign jobs, collaborate with team members and get additional perspective on the tasks to be done, without getting lost in endless back-and-forth email chains.
So here are 3 ways you can turn emails into tasks, and take control of your inbox…
1. Do it directly inside Gmail or Outlook
Did you know that both Gmail and Outlook have their own built-in task feature?
That’s right, you can add your own tasks to keep track of what you need to do, or you can turn emails you need to respond to into tasks without leaving your inbox.
Here’s how it works…
Gmail
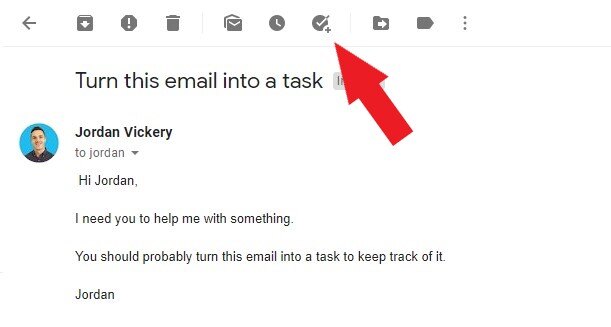
When you open an email in your Gmail account, there are a number of actions at the top you can use. One of these is to ‘Add to tasks’.
Once you’ve clicked ‘Add to tasks’, it will add it to a task pane on the right hand side. If you haven’t used this feature before, then just click the blue ‘Get started’ button.
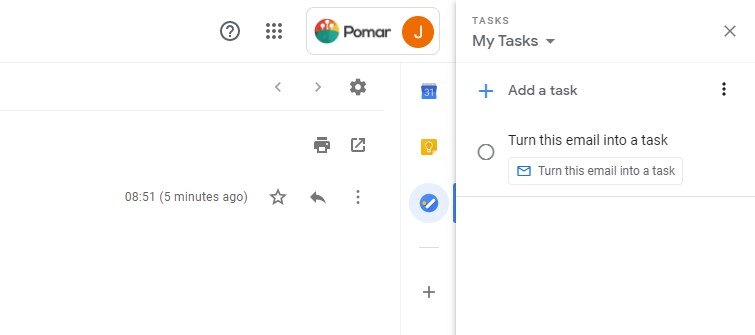
Once the task is there, if you hover your mouse over it and click the icon on the right hand side, you can edit the task. Here you can add some more details, set a due date, and even add some sub tasks if you need to break it down further.
You’ll notice that the entire time the email is attached to the bottom of the task, allowing you to refer back to it and reply when you’re completing the task.
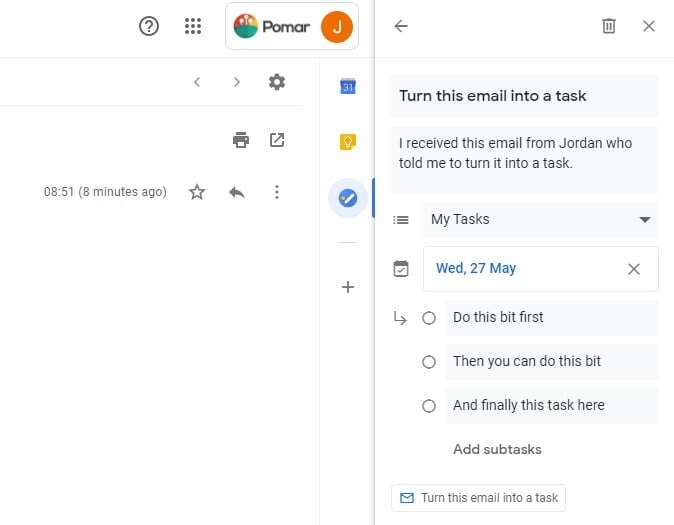
Once done, click the back arrow in the top left corner to return to your task list. And there you go, you’ve successfully turned an email into a to-do that you can easily track.
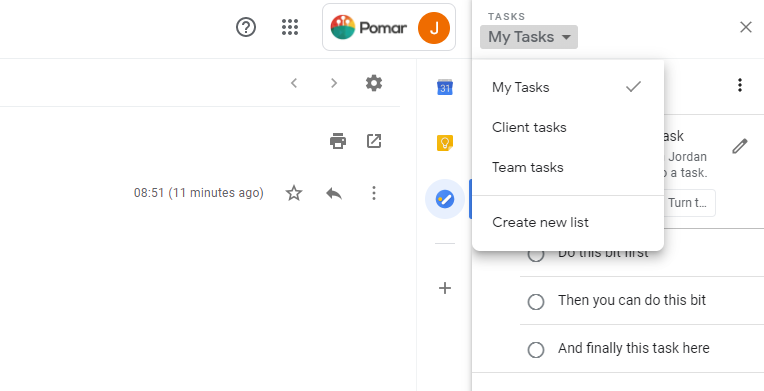
If you want to start using this further, then you might want to explore the different lists you can have available. For example, in the screenshot below you can see that I have set up 3 separate lists:
My tasks (for personal to-dos)
Client tasks (the ones I really need to stay on top of)
Team tasks (for any questions or queries from my team members).
You can set up any number of lists and then when creating the task, choose which list they belong to.
Outlook
Turning emails into tasks inside Outlook works in a similar way - it’s relatively straightforward to use. I don’t have an Outlook account to give you some in-action screenshots, but if you’re an Outlook user then read this article here or watch the video below.
2. Use a task management app like Trello or Asana
As well as being able to turn emails into tasks inside your inbox, you can also add them as tasks in apps like Trello or Asana, if you use these for task and project management in your accounting or bookkeeping firm.
Here’s how they work...
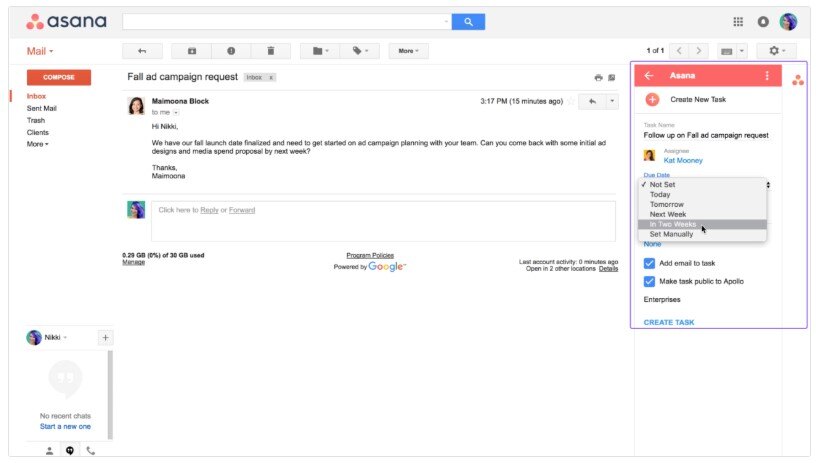
Asana
There are two ways you can do this with Asana:
Install the Gmail or Outlook plugins
Forward your email to an Asana address to add it as a task
Both are relatively straightforward to use. Using the plugin in your email inbox gives you a little bit more control over the task name, and due date etc, whereas just forwarding it to the Asana email address will take the subject line as the task name, and you will have to log in to your Asana to add a due date.
There are similar pros and cons to the Asana options above - where using the plugin gives you a little bit more control over the task when creating it.
3. Use Pixie
Both of the methods above are great starting points for taming your inbox and turning emails into tasks.
The challenge with them though is that they are disconnected from the rest of your practice management process (unless you’re using Asana or Trello to run your practice management, in which case check out how Pixie compares to Asana and Trello here).
This is where Pixie can help to save time and streamline your entire task management process.
You can integrate your Gmail or Office 365 email directly inside Pixie and have full access to your email inbox from inside the app.
This doesn’t mean you have to use Pixie exclusively for emails. If you’re out and about and need to send an email from your email account that’s fine, it will automatically sync through to Pixie once sent.
Here’s how you turn emails into tasks inside Pixie…
As you can see, by using Pixie to turn your emails into tasks, it’s directly linked to the client's record, jobs and files, helping you to keep track of everything in one place.
A Portuguese expat in London, Celso founded Pixie after learning first-hand about the challenges faced by small accountancy and bookkeeping practices. A product-focused leader with over 20 years experience in the software industry, at Pixie you'll frequently find him listening to customers and distilling their feedback into the product and go-to-market strategy.